Important Notice:
WordPress 5.0.x UPDATE (learn more)
Air WordPress Theme Documentation
Thank you for purchasing our theme. If you have any questions that are beyond the scope of this help file, please feel free to publish your question here.
Thanks so much!
To help us with theme FREE updates with new features please take 1 min to leave stars rating for this theme on ThemeForest if you like it, we'll appreciate it:
- 1. Please go to Themeforest login and navigate to your account.
- 2. Click Downloads link and you will see your purchases list:

- 3. Click stars around our theme to leave stars rating:

- 4. Thanks! This little thing will help us to release new theme updates!
- 5. If you don't like something in our theme or have some problems. Please contact us and we will fix your issue and will help you! We are always welcome for your advices how to improve our theme.
Quick Link and FAQs:
Because the BM PageBuidler plugin and page/post option will not work with block editor for now. We disable the block editor of WordPress 5.0.x by default. If you want use the block editor, please install/activate the Classic Editor plugin(Appearance > Install Plugins).
Installation
To use a WordPress theme you must have a working version of WordPress already installed. For information in regard to installing the WordPress platform, please refer to the WordPress Codex here
Video Guide: coming soon...
- Extract the package file
- air-theme folder - Air theme folder
- air-theme.zip - Air themem installable file
- Documentation folder - help file
- air-child.zip - Child theme installable file
- plugins folder - The plugins installable file
- Log folder
- Install theme file
- Using the Envato WordPress Toolkit plugin:
Please refer this post.
Note: How to get the API Key of themeforest(new version)? Refer this post. - Using WordPress Theme Upload:
Be sure to extract the file "air-theme.zip" from the ThemeForest download before uploading. Using the ThemeForest ZIP file directly will result in a "Missing Style Sheet" error.- Login to your WordPress admin.
- In the "Appearance > Themes" menu click the tab "Install Themes".
- At the top of the page click, "Upload", then click the file input to select a file.
- Select the zipped theme file, "air-theme.zip", and click "Install Now".
- After installation you will receive a success message confirming your new install.
- Click the link "Activate".
- Using FTP:
- Login to your FTP server and navigate to your WordPress themes directory.
- Normally this would be "wp-content/themes".
- Extract folder "air-theme" from the zipped theme.
- Copy the folder "air-theme" to your themes directory.
- After the files finish uploading, login to your WordPress admin.
- In the "Appearance" menu click "Themes".
- Click "Activate" for the theme "Air Lightweight Portfolio WordPress Theme".
- Plugins Installation
After activating the theme, you would notice the message box on the top of admin pages to ask you install/activate some plugins, you could use them for free or cancel the messages. Include: BM Pagebuilder, BM Shortcodes, Contact Form 7 ...

- Click Begin installing plugins in this message.
- You could check all required plugins, if you don't use Twitter/Contacct Form module, you could not insltall Contact Form 7 and Rotating Tweets:

- Import Demo Data
- Go to Appearance > Theme Options > Import Demo Data, click "Import Demo Data". After importing data, you'll find the images of demo data are placeholder, you could replace them as yours later.

- For WooCommerce demo data, please install the "Product Import Export for WooCommerce" plugin(get it here), go to WooCommerce > Product Im-Ex, click "Import Projucts". Choose the "woocommerce-product.csv"(get it here).
- When you finish the demo data importing, please update the google font data(Appearance > Theme Options > Font Settings):

- Go to Appearance > Theme Options > Import Demo Data, click "Import Demo Data". After importing data, you'll find the images of demo data are placeholder, you could replace them as yours later.
After extract the main zip file, you'll see these folders and files:
This template works well for WordPress 4.5.x - 5.0.x, update yours if needed.
Installing the theme can be done in 3 ways. You can upload the theme ZIP file using the built in WordPress theme upload, or copy the files through an FTP client.
Setting Up
1. Logo
To set up logo for your website, you need to:
- Go to the WordPress Admin Dashboard.
- Go to "Appearance > Theme Options" (on left sidebar).
- Go to Theme Options > General Settings > Logo section, here you could upload a logo image or input logo text.
The recommended logo image size is less than 240px(width) * 120px(hight) in on header, this is the container size. If you want the logo be displayed clearly on retina screens, you need to upload a double size image logo(e.g. 480px x 320px).
2. Skin
The predefined colour scheme for your website, please go to ThemeOptions > Schemes
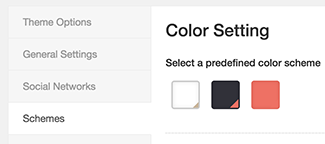
There are many detail colour setting options for every scheme, you could define your own style base on the given scheme setting. Click on the small icon "?" on the right side description for every item to learn detail explanation for the option.
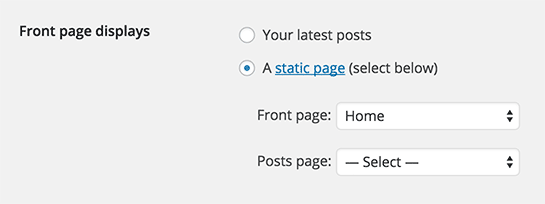
3. Frontpage
To set up the homepage, you need to create a page which you want to use it as homepage, after that, go to Settings > Reading , activate A static page (select below) , select the page from Front page: drop-down menu.
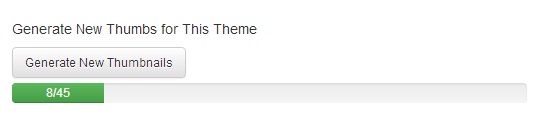
4. Generate New Thumbs for This Theme
If there have been some images in your site already, please click the button. It will generate the right size thumbs for the images.
5. Menu
Before building your custom menu, you need to create your pages first, then navigate to Appearance > Menus, it is recommended to create you menu from Pages or Links.
6. Theme Custom
If you want to change style of theme, please go to ThemeOptions > General Settings, put your css code to Cutom Css box.
You could also use Child theme also, put the cutom css to custom.css file. Refer more about child theme
Theme Options
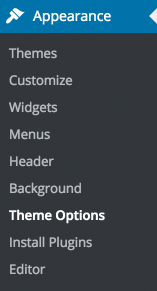
On admin panel the left hand, click "Appearance > Theme Options" to enter Theme Options
From Theme Options, you could:
- Import Demo Data to your website - Theme Options > Import Demo Data
Please install/activate the BM Pagebuilder plugin before import demo data.
- Export Demo Data - Theme Options > Export Current Data
- Setup Website Logo - Theme Options > General Settings > Logo
- Set Placehold Text - Theme Options > General Settings > Descriptions
- Set Copyright - Theme Options > General Settings > Copyright
- Set Icon - Theme Options > General Settings > Icon
- Set Page Loader - Theme Options > General Settings > Enable Fade-in Loading Effect
- Set Custom CSS - Theme Options > General Settings > Custom CSS
- Setup Social Media - Theme Options > Social Networks, set social medial icons on header and share button.
- Setup the Colour and background for Website - Theme Options > Schemes
- Setup the fonts for Website - Theme Options > Font Settings, if there is not fonts in selector, please click the "Update to new Google Font Data" button, it'll load the latest fonts from Google's servers.
- Upload the custom icons - Theme Options > Icons, you could upload custom PNG format icons from here, they could be used in social media links on header and Some modules in Page Builder(like Icon Box).
- Main Container Width - Theme Options > Layout > General > Main Container Width, set main container width
- Border - Theme Options > Layout > General > Enable Border, Enable Bordered layout
- Page Loader - Theme Options > Layout > General > Page Loader, Enable Page loading
- Menu Style - Theme Options > Layout > Header > Menu Style, set header layout
- Show Social Links - Theme Options > Layout > Header > Show Social Links
- Show Search Button On Expanded Menu Panel - Theme Options > Layout > Header > Show Search Button On Expanded Menu Panel
- Enable WPML & Show Multi Language Links On Expanded Menu Panel - Theme Options > Layout > Header > Enable WPML & Show Multi Language Links On Expanded Menu Panel
- Setup Footer Widget - Theme Options > Layout > Footer > Enable Footer Widget for Post Pages / Choose Widget(To set widget, you need go to Wordpess Admin Panle: Appearance > Widgets > Footer 1-5 for Post/Page.)
- Setup Footer Info. - Theme Options > Layout > Footer > Footer Elements
- Setup the meta infomation - Theme Options > Layout > Page/Post > Show Meta On Post Content Page
- Hide Category infomation - Theme Options > Layout > Page/Post > Category to Hide on Page/Post, you could hide some category on posts/pages:
- Enable Post Navigation on content page - Theme Options > Layout > Page/Post > Show Post (Previous/Next) Navigation On Project Item Page(Gallery Post)
- Enable Share Buttons - Theme Options > Layout > Enable Share Buttons for Project(Gallery Post)
- Category for More Project Button On The Bottom of Gallery Post - Theme Options > Layout > Page/Post > Category for More Project Button On The Bottom of Gallery Post
- Items Number for More Project Button On The Bottom of Gallery Post (3 Columns) - Theme Options > Layout > Page/Post > Items Number for More Project Button On The Bottom of Gallery Post (3 Columns)
- Activate Mobile layout in mobile device - Theme Options > Mobile > Enable Mobile Layout
- Featured Colors - Theme Options > Featured Colors, set the featured colors for BM PageBuilder


Posts
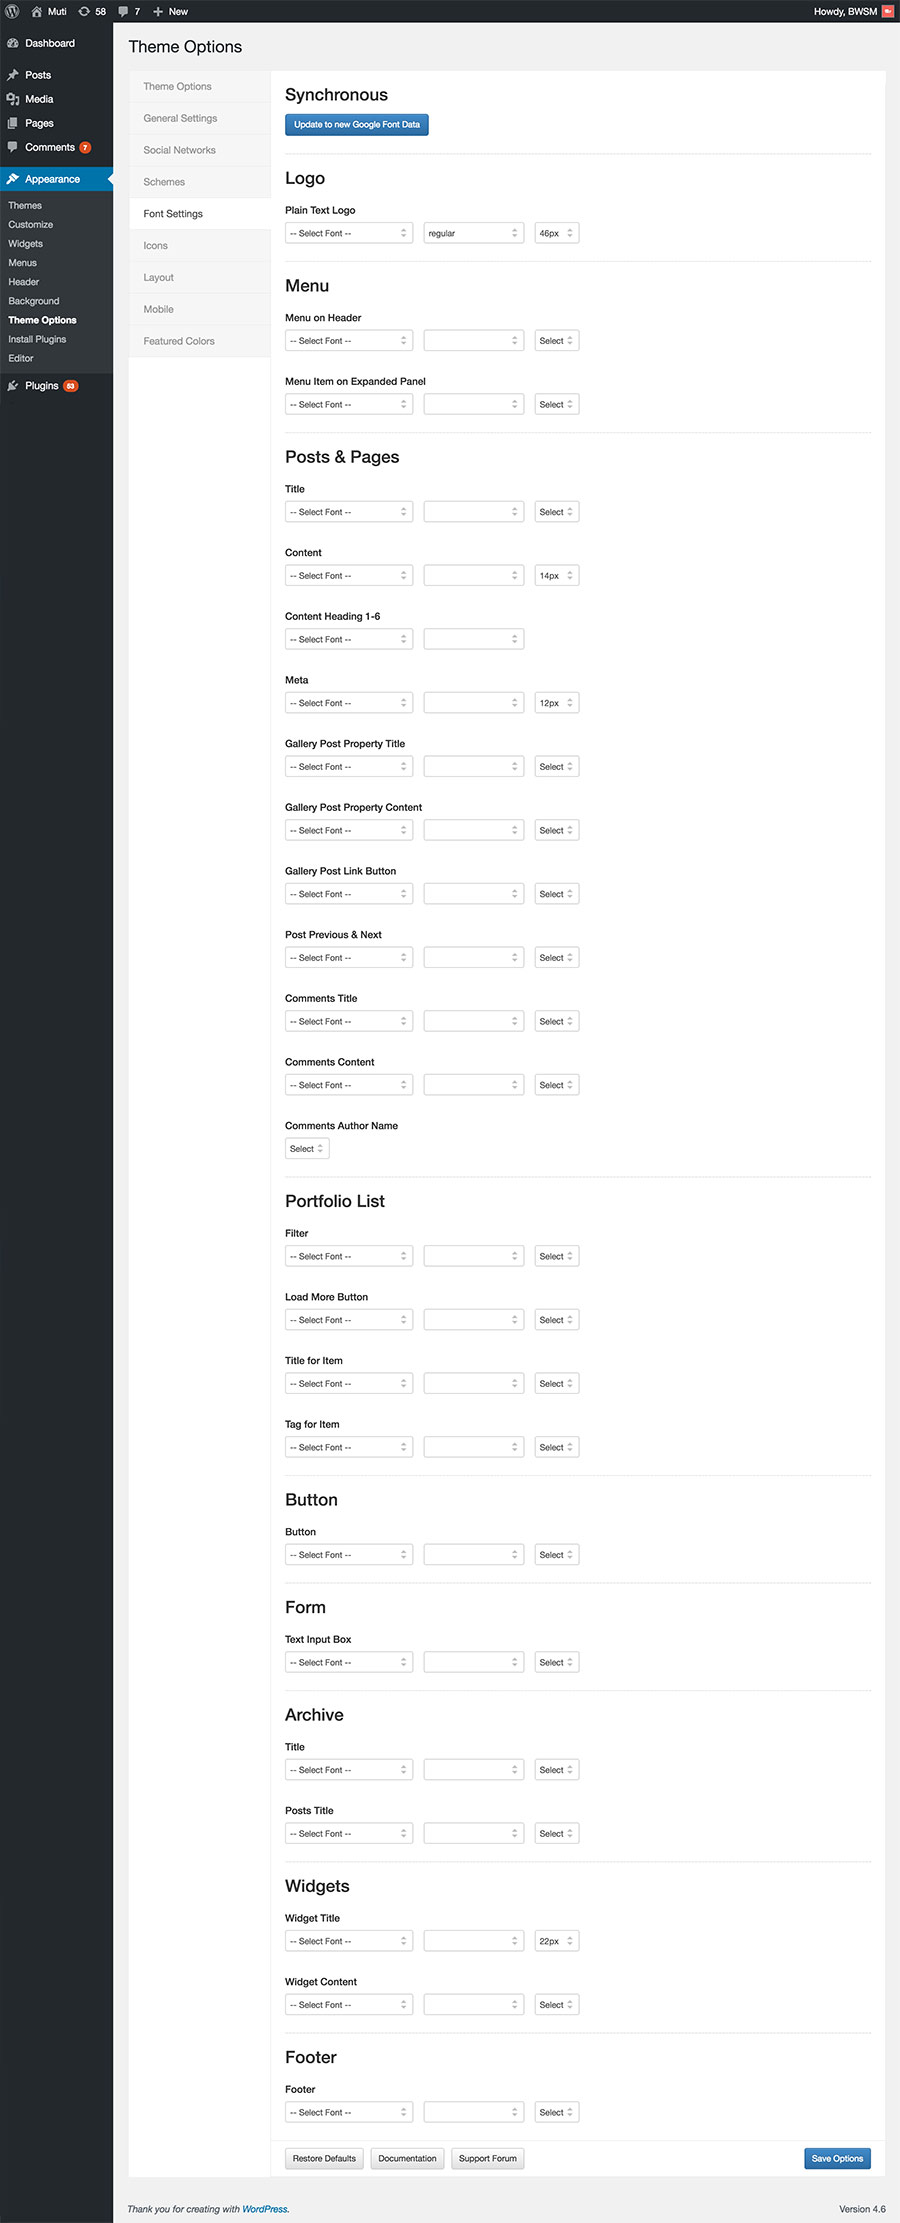
To create a new post, go to Posts > Add New from the admin panel. (refer to this article)
Each post should be set one category at least. You could set category to organize your posts. For the feature of this theme - "Page Template" (Portfolio List), it should list the posts within which category.

You could set "Featrued Image" for posts, the featured image could be shown on top of gallery post(part of templtes):

Or in Portfolio list:
7 Post Formats
The theme provide 7 formats for your post, theses formats would affect the layout of your post in list and content page. You need the to click on the radio button to change the format for a post:

- Gallery Format Post
You could create the project item page by "Gallery Format Post", there are 5 templates built-in.
- Upload the image or pick up the existed image in media library:

- Set template:

- Set List Layout:
Tips: There is not the option on slider template
- Set Title Masking: If enable this option, the title looks like:
Pleae check video guide:
- Upload the image or pick up the existed image in media library:
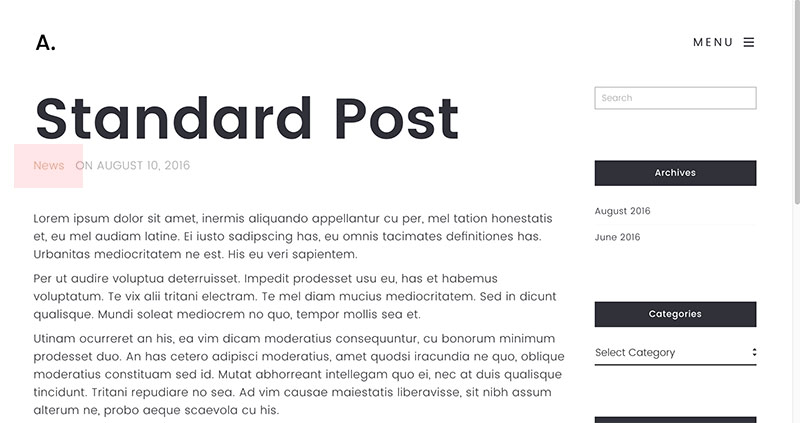
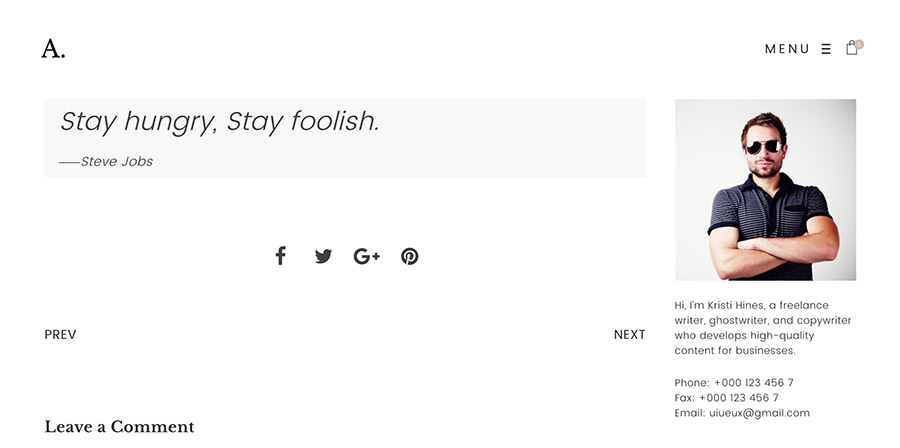
- Standard Format Post / Image Format Post: The standard format will show the title, content and featured image. It looks like:

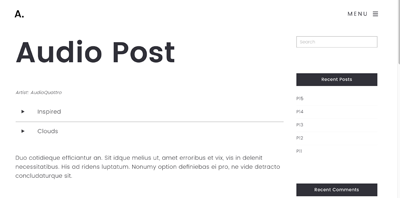
- Audio Format Post: The audio format is supported hosted mp3 files and soundcloud embed code.
The Hosted type looks like: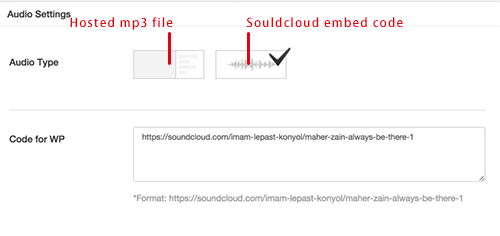
- Video Format Post: The video format is supported Youtube and Vimeo embed code. You could set ratio for video, it will help to remove the dark padding in single post page as possible.

- Link Format PostYou could set one or more text links within the link format post.
It looks like:
You could redirect the link url by the link format post with BM Slider/Portfolio Template also.
- Quote Format PostYou could set the quote text within the quote format post.
It looks like:
-
Excerpt:
Please edit it here: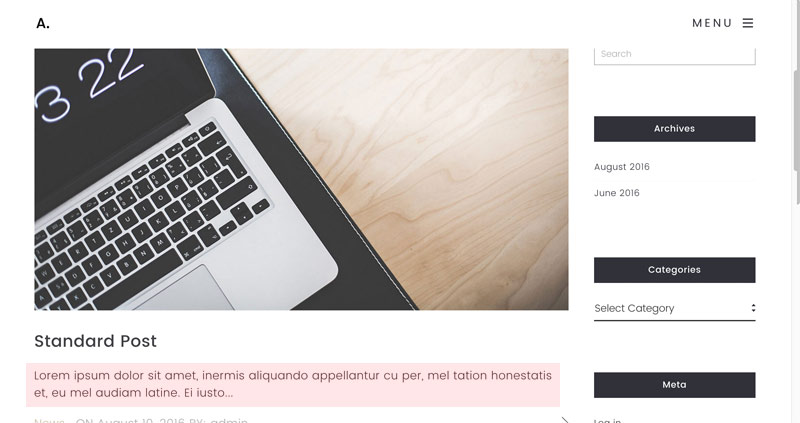

Pages
Go to Pages / Add New, you could build all kind of pages you like.

There are 4 options for page template:
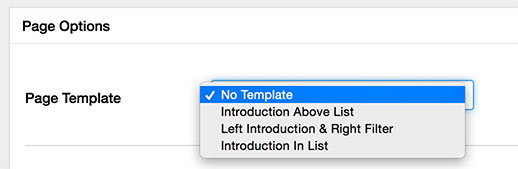
Portfolio Page
- Templates: There are 3 general tempaltes:
- Introduction Above List

- Left Introduction & Right Filter

- Introduction In List

- Introduction Above List
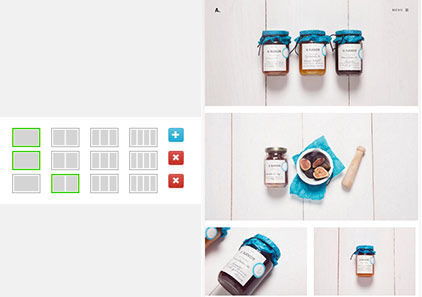
- List Types: There are 4 types of portfolio list, you should pick up a category for portfolio list, the posts(Gallery format post and Link format post) belonged this category will be shown on list. The portfolio list types included:

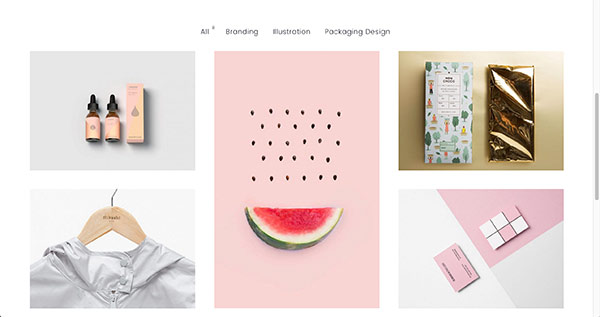
- Masonry Grid

You could set the grid layout on each gallery post.

You can set mouseover effect, if you want to change transparency of mask. plase use the custom css(“Appearance > Customize : Additional CSS”):
.no-touchevents .grid-mask-filled-left .grid-item-con:hover:after, .no-touchevents .grid-mask-filled-center .grid-item-con:hover:after, .touchevents .grid-mask-filled-left .grid-item-con.air-hover:after, .touchevents .grid-mask-filled-center .grid-item-con.air-hover:after {
    opacity: 0.1;
}
You can set it 0.1 - 1
- Masonry

- Grid(Thumbnail)

- Grid(Thumbnail + Title)
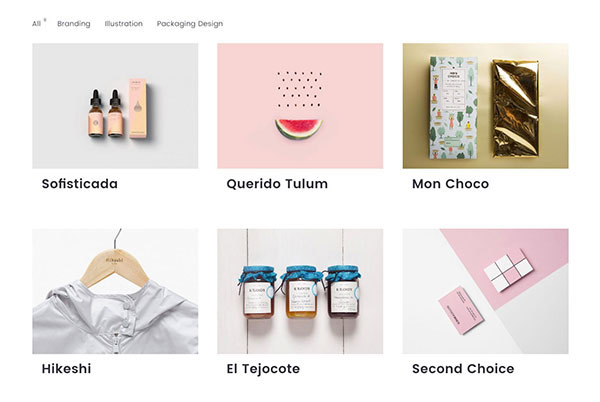
- Masonry Grid
- Filter: If you want to show filter for the portfolio list, please enable the "Filter" option. Make sure there are sub-categories in the category of the portfolio list. The category structure looks like:

- What Thumbnail Does:
- Open The Portfolio Item: when you click one item, the gallery post page would be linked. If this item is a Link format post, the first url set within link post would be linked.
- Open Lightbox: when you click one item, the full size thumbnail will be opened in lightbox.
Pleae check video guide:
Static Page
You could create a static page (such as Contact, About ...) by "No Template" option, we suggest you use the Page Builder to build this kind of page if you need a little complex layout(refer to Page Builder).- Sidebar Layout, you could set the sidebar layout or fullwidth layout, in sidebar layout, you could choose widget. To set widget, you need go to Wordpess Admin Panle: Appearance > Widgets > Sidebar 1-10 for Post/Page.

- Title Option: You could set the option to hide/show title wrap:


- From Page Top
Enable this option, the page would looks like:

- Spacer above Content
If you enable this option, there is a spacer on content area:

- Show Featured Image
You could create a image cover by this option, you need to set a Featured Image for the page. If this Featured Image is dark, you could set the light logo


BM Slider
-
Post Slider:
You need to pickup a category(or several categories), all the posts belong to this category would be shown in your slider. Each Post in this category should be set Featured image. If you click one slide in BM slider, the Post page(shown on this slide) will be linked. If you want to use external link, please use Link Post, input the external URL into the first "Link" box. You could also edit the Order, Auto play by default ...
-
Text Slider:
You need input header text and content text. If you want to the text masking effect, please set "Heading Background".
Tips: The text masking effect only works for webkit browser, like Chrome, Safari.
Work With Page Builder
The theme provide drag & drop page builder for your pages, press the button "Switch to Page Builder" to enable it. Following is a brief introduction for the page builder:

1. Wraps
The modules could be placed directly into the panel or be dragged into a wrap, depending on your layout. A standard wrap have the same width with page content.
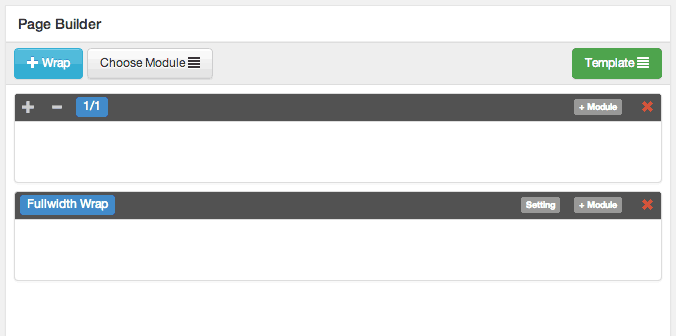
Fullwidth Wrap
A fullwidth wrap have the following features:
- A wider width than the page content, such as to be full-width to outer container, it could be used for your full-width sections.
- Support background color/image/video, IE 8/9 and touch devices do not support the video background, you need to upload a Atl Image for them.
- Parallax effect for image background/Foreground, the effect do not support touch devices.
- Support tabs.
- If you set the dark background color, please active the "Shift Text Color for Dark Background", the font color of this fullwidth wrap is set as white forcibly.
- If you want the content of fullwith wrap filled to full width of screen(no left/right padding), please active the "Fit Content to Fullwidth".
2. Modules
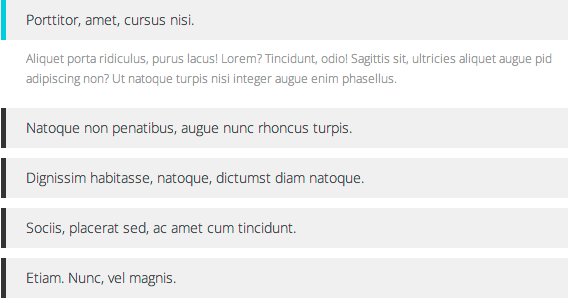
- Text Block
You could set up a background color for the text block, leave it empty if you don't want to show any background color.

- Icon Box
Icon on Left
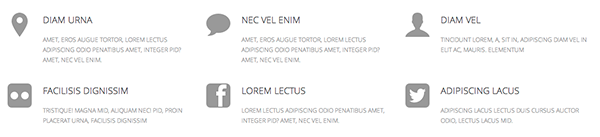
Icon on Top
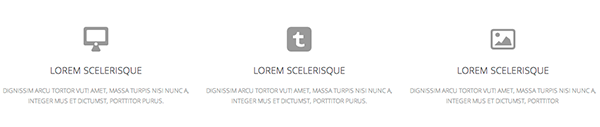
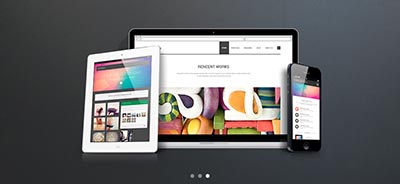
- Image Box

- Text List
You could set a bullet icon for every item

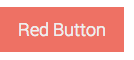
- Button
You could create a button and customise the size and colour.
- Single Image
Single Image module is to enter a single image to your post/page.

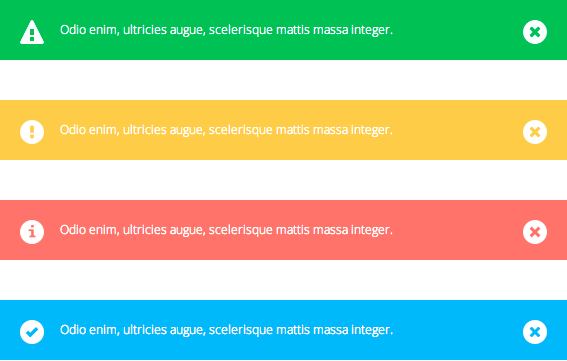
- Message Box
This module could create 4 types of message box: Success, Warning, Error, Information
- Accordion / Toggle
Accordion and Toggle has the same style in front end, you could expand only one item in Accordion mode and could expand multiple items in Toggle mode.
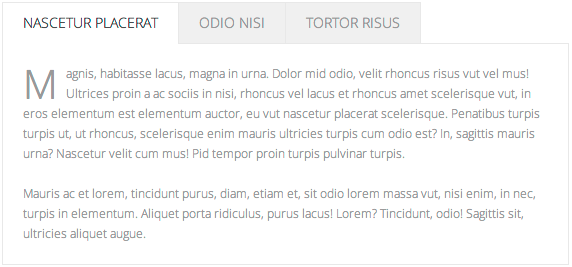
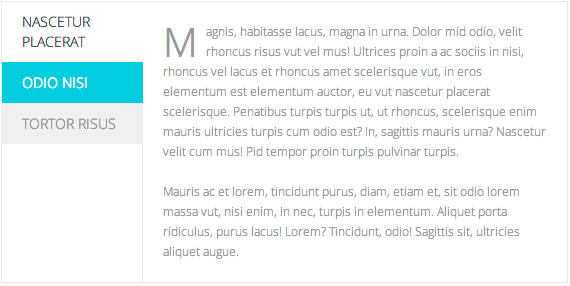
- Tabs
Horizontal Tabs
Vertical Tabs
- Divider
Divider module is to place a spacer or lines in the vertical dimension.

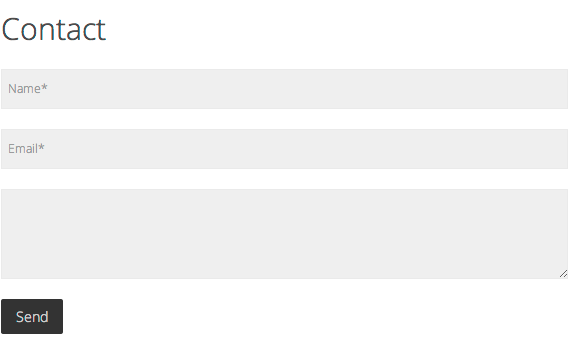
- Contact Form
The theme support the famous plugin "Contact Form 7", once you install it to your WordPress, the Contact Form 7 option would appear in the Form Type drop-down menu. Following image is the standard Contact Form module looks like in front end.
- Video
To enter a video to the page, you need to copy and paste the embeded code of the video, a example with Vimeo video:
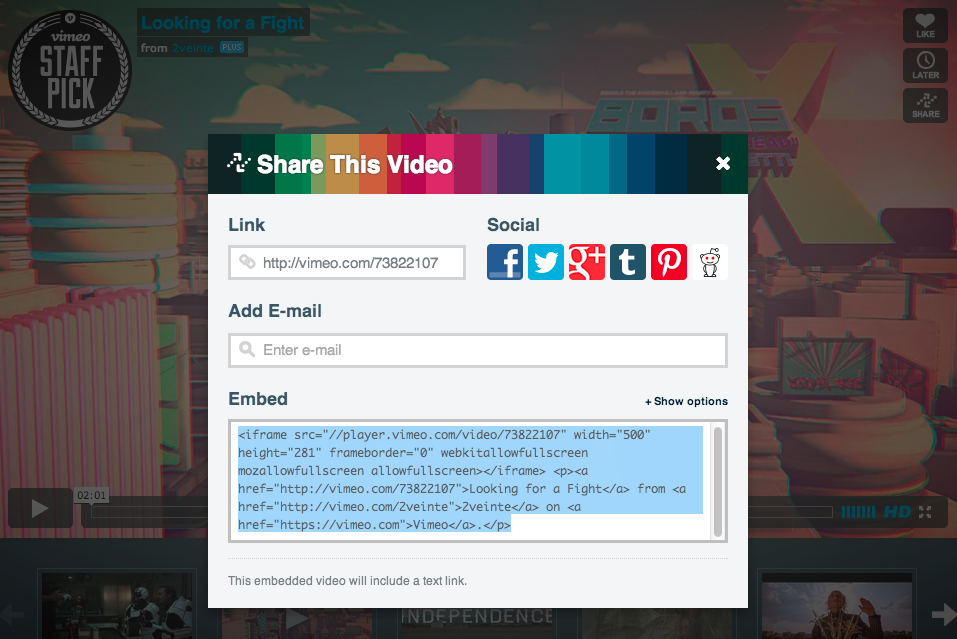
Supported video:
- Vimeo
- Youtube
- and other embeded videos from video sites
For Vimeo and Youtube video, you could directly copy/paste the link of the video:

- Promote
It is a section to place a slogan or other words with a mouseover background color and link.

- Google Map
You need set the Google Maps ApiKey firstly:
- Get the Google Map Api Key here.
- Login wp-admin, go to "BM PageBuilder" on left bar, Paste the key

The Google Map module need you provide the name of your location.
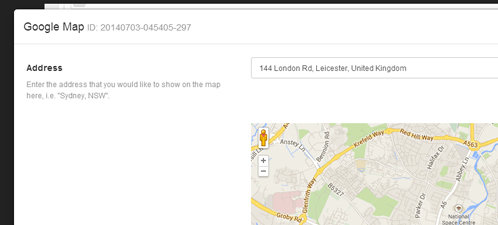
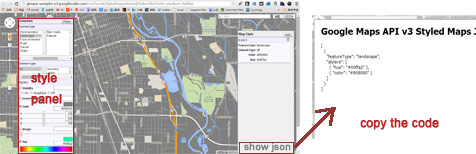
If you want to use Google Map Style, please go to this page to edit the map style.
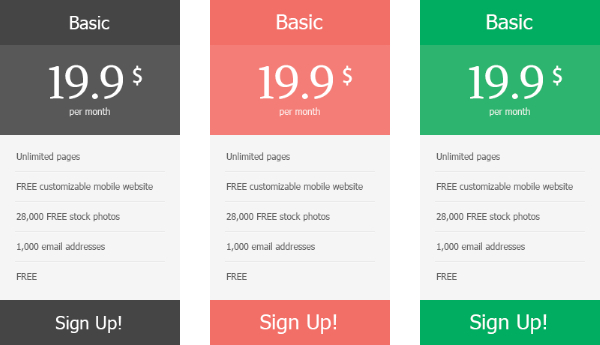
- Price
Build your price block by Price module, by now it support not more than 4 price blocks, and it is recommended to make the module fullwidth(1/1).
- Slider
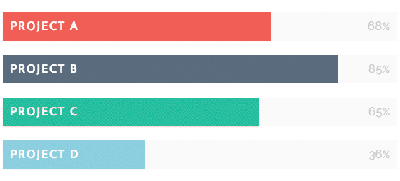
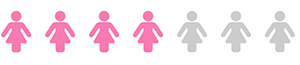
- Infographic
Progress bar:
Pictorial:
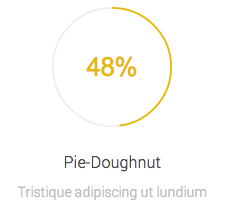
Pie:
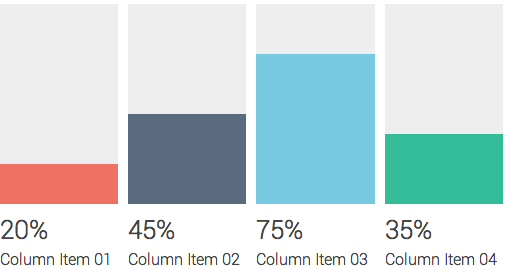
Column:
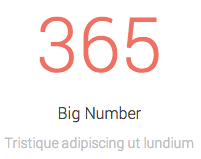
Big Number:
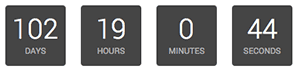
- Count Down
The Count Down module allow you assign a deadline and to create a timer automatically on front-end.
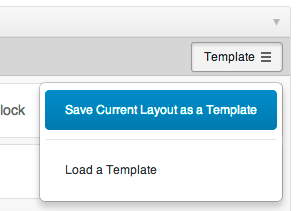
3. Save and Load templates
Once you have build a layout via the page builder, and you want to clone them to other page/posts, you could save the current layout to a template and load then in the other page/post page builder section.
Short Code
When you edit the text via a text editor, you could use Short Code to add some advanced elements to your page/post:

If you don't see the icon(green plus), please go to Appearance > Install Plugins to install BM Shortcodes plugin.
Following are the short-code elements this theme support:
- 1. Button
- 2. Line
- 3. Heighlight
- 4. Blank
- 5. Gallery
- 6. Image
- 7. Dropcap
- 8. Column
- 9. Fixed Width Column
- 10. Icon
- 11. Text
- 12. Text List
- 13. Switching Words
Translation
1. Tranlate
To translate the static strings of theme, it is recommended to install the free Loco Translate WordPress plugin here(check the DOC). The default pot file "air-theme.pot" is in /air-theme/languages/ folder.
2. WPML
It is recommend to use the popular WPML wp plugin if you want to make a multi-languages site:
2.1 Translate the Pagebuilder
- Install the plugin Translation-Management. Go to WPML/Translation-Management”, make sure “Translation manualy” selected
- Created a new page(make sure under default language), set to Pagebuilder editor, put in some Pagebuilder modules, click publish
- Check ‘Duplicate’ checkbox and click on “Duplicate” button (see the screenshot below) at the right sidebar. “Duplicate” button will be displayed after checking of checkbox. Click the pencil icon to translate the page


- When you edit the the page on non-default language, plz click “Translate independently” button at the right sidebar. Otherwise all your translations can be replaced by default content

- Please don't use orgin modules, please clone or create new one module to edit for copied pages. (refer video guide)
2.2 To translate the copyright information, Comment title and so on, please:
- Install the plugin WPML String Translation.
- Go to left menu: WPML/String translation
- Find the following string:
- Click on the “translations” on the right side of every string item, enter the target translated words, check on “Translation is complete" and save it.
    [ux_theme_option]theme_option_copyright
    [ux_theme_option]theme_option_descriptions_pagination
    [ux_theme_option]theme_option_descriptions_comment_title
    [ux_theme_option]theme_option_descriptions_your_message
    [ux_theme_option]theme_option_descriptions_comment_submit
    [ux_theme_option]theme_option_descriptions_next
    [ux_theme_option]theme_option_descriptions_prev
    [ux_theme_option]theme_option_descriptions_portfolio_learnmore
    [ux_theme_option]theme_option_descriptions_tags
    [ux_theme_option]theme_option_descriptions_menu_back
Speed Optimization
We strongly recommend that you use Autoptimize to optimize page speed, it is totally free WordPress plugin, it is very easy to use.
Check the 3 options:

Uncheck the "Also aggregate inline CSS?" option under advanced settings.
Please activate this plugin after finishing site creation, or the cache would disturb the custom work(custom css/js).
Included Files
- Javascript files
- main.js - main js plugins:
- Modernizr 3.3.1 - Respond user's browser features
- Waypoints v4.0.0 - Trigger something scrolling a anchor
- Isotope v3.0.1 - Masonry layout plugin
- PACKAGED v2.0.0 - For Isotope packery layout
- PhotoSwipe v4.1.1 - Lightbox plugin
- ImagesLoaded v3.1.6 - Judge images loaded or not
- OwlCarousel2 v2.0.0 - Slider plugin
- jQuery collagePlus - Justified Gallery plugin
- LazyLoadXT v1.1.0 - Image lazy load plugin
- VelocityJS v1.2.3 - Animation effect
- jquery.jplayer.min.js - js/jquery.jplayer.min.js - HTML5 media player plugin
- custom.theme.js - js/custom.theme.js - Air theme main js
- main.js - main js plugins:
- CSS files
- Bootstrap 3.3.5 - styles/bootstrap.css - Bootstrap layout
- Owl carousel 2.0.0 - styles/owl.carousel.css - Owl carousel plugin css
- Photoswipe 4.1.1 - styles/photoswipe.css - PhotoSwipe plugin css
- style.css - style.css - Air theme main css
Once again, thank you for purchasing my theme. If you have any questions that are beyond the scope of this help file, please feel free to publish your question here.
Thanks,
SeaTheme